Showing posts with label ham radio. Show all posts

Tuesday, 12 May 2020

Taking the mic

Happy that the printer seems to be working OK, I decided to clear out some part spools I have sat around and taking up space, I decided to print some radio parts for my radio projects.

I had a look through thingiverse and found some bits to print for my ubitx v4 radio I'm slowly starting to make into a portable radio, for going mobile with it.

All his info for the build is here
 

I came across a mic that makes use of the original parts in the kit, I downloaded the files and found the ppt button to need a lot of support whatever way you try to print it, so I set up a few ways to try to print it, in the end the best print I got was with it on the side.

I think it worked quite well, what do you think?


This is my video of my case

A cable has been ordered for the finish of the build 


Sunday, 3 May 2020

Amazon did good


Well 1350 on Sunday and the screen arrived brilliant service, and brilliant packaging, try installing the ubitx information tomorrow when I get time.

Saturday, 2 May 2020

Amazon for the Win

After my disappointment before the weekend I decided I would try trusty Amazon, as im a prime member things get delivered next day (in this pandemic things don’t always arrive same day but they are usually within a week and it keeps you updated)

So I ordered a Nextion 3.2 inch screen and it says it will arrive on Sunday let’s wait and see.


Friday, 1 May 2020

Ubitx modifications to work with the Nextion screens.


The raduino board behind the display houses an Arduino nano, to fit a nextion screen to your Ubitx board you need to flash a newer firmware to the Arduino!

If your screen allows you to select a com port and set it to nano 328p like and the baud rate, like in the picture below ignore the ch340 and the Arduino IDE steps and scroll down to the Xloader section.


 I found some issues with this so I thought I would share my findings for others that have never worked with the Arduino microcontrollers before, this is updating the Arduino are two diffrent parts that make the nextion screen work

Skills needed:
soldering

Ok before I start I recommend you buy an Arduino nano328p  as they unplug from the board (I recommend buying without the header pins fitted as header pins are fitted to the top of the board), you can find these on amazon and ebay for less than £5. and the origonal nano is there and working should you need to go back to the lcd screen for any reason.

Tools needed:
soldering iron
mini usb lead (not a micro usb)
tools to get to your raduino board if fitted into a case

Software needed:
ch340 driver Here
Arduino IDE here
Xloader here (auters websire not available)

The Driver:
Ok install the ch340 driver is needed for most of the Arduino Nano boards as they are clones and use this driver board. Sometimes this fails to install properly on winnows 10 it informs you of this, restart the installer and click uninstall, once uninstalled click install and it should work.

Arduino IDE:
I did this as im not sure why but I could not get xloader to flash the firmware across to the board until I uploaded a program through the IDE for some reason!

ok on the site there are many ways to use it from a web interface to a windows app or download it and install to the computer. I have tried the app but some of the projects I have made have had issues with flashing the firmware to the boards for some reason. So I downloaded the IDE and installed manually.

If you don’t use official Arduino boards for your projects I recommend making a donation to them for all their hard efforts making the software so you can work with these boards.#

Ok once installed restart your computer.

When its restarted plug the Arduino into the computer, the computer should make a noise saying its recognized it’s been plugged in and the power light should come on and the nano
Now start the Arduino ide.

Click on file on the top menu then go down to examples > basics>blink, the blink text should show in the main editor box.


Then click on tools in the top menu scroll down to Board then a side menu comes out and find nano.
Then in tools scroll down to processor and select the atmega328p (old version) I believe the new version is only on the newer official nano boards)

Also in tools check the port no is correct for the board its easier if there are no other usb connected to the computer at the time

Then below the file menu there are some icons, click on the right arrow next to the tick (should say upload) this will send the blink file to the Arduino details as it goes information will come up in the bottom of the ide and a progress bar will tell you what’s going on.


If you look at the four led lights by the reset button on the board the tx and rx leds will flicker very quickly when it says uploading in the ide at the bottom once done it will tell you what its done and if it was successful

Ok if that works without fault leave the board connected and open xloader


Xloader:


Ok sometimes its as easy to set up xloader you open it and it it works straight off, if your reading this you may be having a bit of fun getting to this point

I downloaded the nano firmware from HAMSKEY and unpacked it, there are two files one for the v2,3,4 boards and one for the v5 board open the correct file to your version Ubitx board and open the read me file and it tells you what file you need for your UbitX.

In x loader


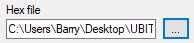
The top line hex file is the file you want to flash to the nano click on the square with the dots to find your hex file and the path for that file once you open it comes up in the white box

Use the drop down menu and select duemilanove/nano (atmega328)


Com port needs to be the port of your nano, the same as you used in the IDE
Baud rate should set when you choose the device but don’t use any more than 57600


Press upload and it should come up with whats happening in the very bottom of program, it should take less than 30 seconds from pressing the upload button, again tou will see the tx and rx lights flash on the board and when they stop the program will confirm if its worked or not.


This nano is ready to swap out with the other nano on the raduino


NOTE: the Nextion screen wont work until you upload the files to the nextion screen, that will be done once I receive my screen

Thursday, 30 April 2020

Multi meater


One of the most important bits of equipment for the work space is a multi-meter.

This multi meter is years old but it’s all I need for testing when working on the bench, don’t get me wrong I would love a better meter but this has never let me down and I can use my money for other things.

Cutters


Another tool for the work bench I could recommend is a good set of cutters.

I purchased a set of cutters from amazon or eBay I can’t remember now and they was as cheap as I could afford to get at the time, I try not to buy cheap as the old saying of buy cheap buy twice but to be fair these things are rather impressive as they handle cutting most things I throw at it.

They cut flush and clean I have had these a good few years now and they still seem to cut very well.

Mega328


With radio I’m finding all sorts of tools to help you in the day to day of your projects for instance the mega328 I have, it tests resistors and capacitors npn pnp and mos it will test the part and give you details of what it thinks it is.

It cost me about £9.00p when I purchased it and I can’t fault it so far.

Plug the legs of the item into 1,2 and or 3 of the zif socket and lower the arm on the side then press the button and it should give you some readings of the part.


I purchased mine on ebay if you search mega328 there are lots that come up, I recommend buying pre built as I have built a few of the kits and none of them seem to work properly.

Lesson learned

I am looking to update my ubitx to a nextion screen so I ordered one off of ebay. The seller advertised as a uk seller and the delivery said 3 days’ details in the description from my understanding they are shipping from the uk to the uk.


Once I purchased the item it says nothing about it coming from china so I waited 4 days and nothing arrived, so I checked the tracking of the item and found it to be coming from china!


I have messaged the seller of my disappointment as I could have brought others a few pounds cheaper if I wished to purchase from china I eagerly await a response.

04/05/2020
still no response to my message via ebay so I have reported the customer for misleading buyers, apparently I won’t hear a response from them so I guess we will see if the item gets reworded.


Thursday, 23 April 2020

Ubitx case


The ubitx case arrived today and it looks awesome, its heavy duty metal and all the bits fitted to it, it comes with a 2x16 screen fitted and a data ports at the rear and the bonus nextion screen front.

Measured up and fund it to be a 3.2inch screen needed, (ordered ready to see what all this nextion screen is all about, there appears to be no damage or marks to the case it looks brilliant.

I removed the top cover to find the cables for the mic unit to be fitted to and in the front of the case and the power supply, I also found packaging inside, to my surprise I found a ubitx board! A version 5 board!
I decided to plug it in and it lights up. As I have no antenna I can’t see if it works any further than this but I’m hoping.


Tuesday, 21 April 2020

QRP Labs Qcx


I ordered the QRP Labs QCX kit it is a cw radio on 40meters (there are many types you can order) with a transmit power of 5 watts!

The kit arrived quite quickly as I ordered it with express shipping (less than a week to arrive from over sea’s)

The hardest thing to make up was the transformer windings. After this it was fairly easy to build.


I recommend downloading and reading the manual at least once just before you start the build and while your building the unit, Double check everything before you solder, some parts being fitted are hard to go back on once you solder them.


The surface mount kit is already soldered and tested on the board, I would recommend you purchase 8pin ic sockets and 14pin socket so you can replace the chips if needed and I had some header pins as I lost two of mine.

To find out more about the QCX click HERE

To see a video on the QCX build by the make of the kit click HERE

There is a facebook builders group click HERE


Monday, 20 April 2020

Carried away with eBay


Ok I found a proper metal ubitx case on eBay today and I stupidly got carried away with bidding on it, I may have bid too much. (don’t tell the wife!) in intrigued by the display that’s fitted in the front and hope it’s a little more than the listing says it is.

Let’s hope im right……

Finished my qrss beacon


Finally getting round to finishing off the QRSS beacon by qrp labs, I’m currently trying to find a way to fit the 7805 voltage dropper so I can then use any voltage when I’m off out with my equipment.

To be fair with the size of the case I think I’m more likely to leave it on the table as it’s a rather large box to carry

Furloughed

I offered my boss to go on furlough should the need arise, my boss took me up on the offer.

I’m quite happy to be furloughed at this time, when the pandemic 1st started from the government reports it sounded like the virus was dangerous to the elderly and people with health issues, after a bit of time it turns out fit and healthy people and even children have died from this illness!

Now have time at home. I have projects to get on with so hopefully I’ll get some done along with helping home school the children.

Friday, 17 April 2020

Ubitx v4 Modification PT1


Ok so I have been on to the web and found that the v4 needs some modification to the board.

I found the relays and they have arrived in a week from a uk seller

I have tracked down the inductors from Poland but the seller is away so I’m unable to order them at this time.

So I need to change all 5 of the relays on the board, the 1st task is the hardest desordering the pins of the relay from the board.

It’s difficult to remove them I found using a small amount of new solder, some flux and solder iron to get the old solder to flow again and use a solder sucker to remove the melted solder careful not to overheat the board and damage the tracks that you will need to solder the new relays back to.

I removed all five of the relays at once then soldered the new one’s in, take care the relays are soldered flush to the board.


Friday, 31 January 2020

Ubitx Information


I started to research about the ubitx today and found one that seems to have a wealth of knowledge for most versions of the ubitx and all the things that can be done with a ubitx.

It appears to be a good place to start Ubitx.net

Friday, 24 January 2020

Ubitx arrives


Today the Ubitx arrived and it looks cool it is the version 4 board so I need to look into the board details and see if there is anything needed to be done to it.

It came with the previous owner’s case, I’m not sure if I’m going to keep the case or find something else to put it in, then I need to connect it all up.

Time to do some research into the whole thing!

Tuesday, 21 January 2020

UBITX


Ok it looks like I won a ubitx kit last night, its an older board but i think its part of the fun. exciting times!


Ok for people that don’t know about these cool bits of kit they are basically a lego kit of the radio world, the main parts are made you can make your own radio.

The Ubitx is the newer kit from the Bitx board, they are made in india, The Bitx was only 40mtr band, The Ubitx has four bands it can work on, it comes with a board and display with the randurino attached to it and a load of other bits to make the ubitx work.

You can basically build it as it is on the bench, and as you go along you can add or modify the radio as you go!

for more info click here